Laser cutting technology is transforming industries from manufacturing to design. If you are an artist, engineer, or entrepreneur, investing in a laser cutter will instigate projects you can’t do with traditional cutting methods. If you’ve recently received a laser cutter or are considering getting one, it’s worth understanding how it should be set up and maintained to perform its best over time. This comprehensive guide will take you through setting up and maintaining your laser cutter and provide tips to keep your equipment in good working condition.
Understanding Your Laser Cutter
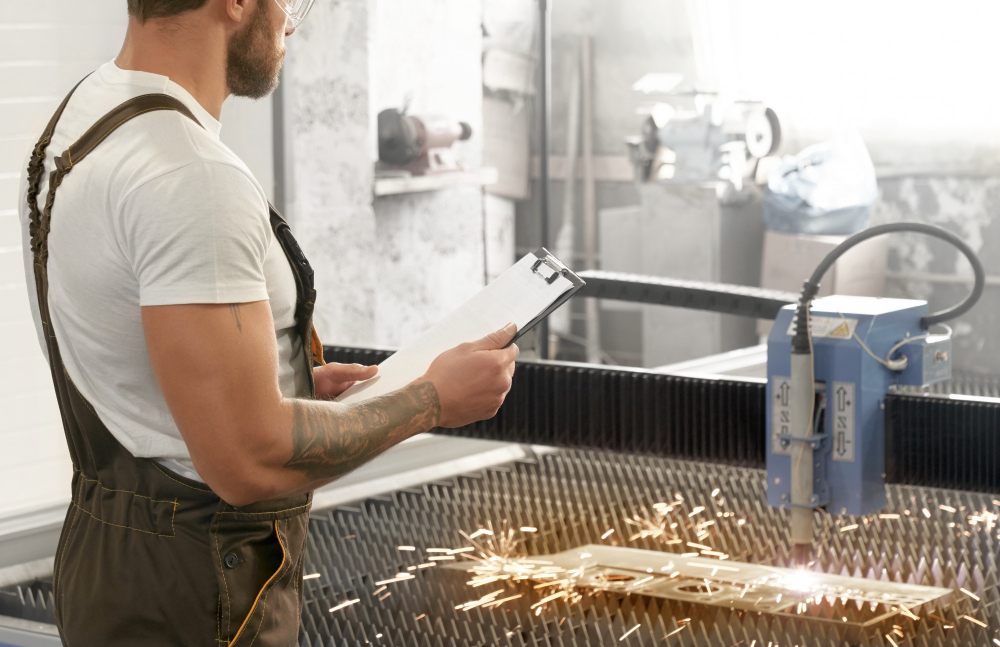
Before we start setting up, here are some things to consider for your laser cutter: A laser cutter is an industrial machine used to cut, engrave, or mark material using a focused beam of light. This means the laser is aimed at the material to vaporise or burn through it, creating clean, precise cuts.
Laser cutters are utilised by various industries, including industrial manufacturing and jewellery making, and they are even being adapted for education in Australia. Depending on the machine’s specifications, a laser cutter and engraver can work with multiple materials, including wood, metal, plastic, and fabric.
Step 1: Setting Up Your Laser Cutter
Unboxing and Placement
After getting your laser cutter from your supplier, the first thing to do is open the box and set the machine up in a clean, level, and well-ventilated space. Clear the area of any obstacles, and set the cutter close to a power supply and fume exhaust, since these machines usually produce smoke and gases when used.
When you buy a laser cutter in Australia, check whether the equipment complies with the local safety standards. A sturdy table or stand may be necessary for larger cutters to support the cutter’s weight properly and provide stability during operation.
Software Installation
Now that your laser cutters have been installed, the next step is to install the software required to run the machine. Most laser cutters and engraver systems ship with proprietary software, though programs like AutoCAD, Adobe Illustrator, or CorelDRAW are also quite common.
To make things easy, verify that the graphic tablets Australia you earmark for your design work will integrate with the design software you intend to use. They can provide greater accuracy when creating custom designs or images to be engraved or cut. Install it according to the instructions, and connect the cutter to your PC and design device via USB or network connection.
Calibration and Testing
Once the software has been installed, we need to calibrate the laser cutter Australia. Calibration ensures that the laser is precisely aligned to the cutting surface. Automatic calibration is standard on modern laser cutters, but if the machine is moving or being used for the first time, you may have to adjust some settings manually.
Test the cutter on a scrap piece of material to ensure the cutter is working correctly. This will allow you to check whether the laser cuts at the required depth and whether the settings meet your design specifications.
Step 2: Regular Maintenance for Your Laser Cutter
If you maintain your laser cutter well, it will be the most valuable and efficient. Regular maintenance also lowers the chance of breakdowns, which can be expensive and interrupt your work. What are the most important things to keep on your laser cutter?
Clean the Lens and Mirrors
One of your laser cutter’s most vital maintenance activities is cleaning the lens and mirrors. Over time, debris and residue can build up on the lens, which can cause cuts to be less efficient and of lower quality. Regularly (every week), clean the lens with a soft, lint-free cloth and lens cleaner solution. Do not use harsh chemicals or abrasive materials; these can scratch the lens.
Check for Wear and Tear
As with any equipment, a laser cutter will wear and tear over time. Check components such as the laser tube, motors, and belts for damage and wear regularly. If you see any problems, replace the parts before they cause damage elsewhere in the machine.
For instance, if your laser cutter and engraver start changing their cutting depth or power output, it’s probably time to replace the tube. In terms of usage, laser tubes typically require replacement after a few thousand hours of operation.
Clean the Work Area
If you use your laser cutter for a lot of cutting or engraving, you will notice dust, smoke and other debris building up around the work area of your laser cutter. Clean the machine’s exhaust vents, fans, and surrounding surfaces regularly.
Air filtration is another helpful aspect that many laser cutter users feel is removing smoke and fumes from the air. This is a significant consideration when the machine cuts materials that can cause an unpleasant odour, like acrylic and leather.
Replace Consumable Parts
A laser cutter has several consumable parts you should expect to replace regularly. These can include the focus lens, mirrors, and the laser tube. Be aware of their wear and replace them as needed to prevent cutting efficiency from being compromised.
The other thing you should do when replacing parts is use high-quality components compatible with your specific laser cutter model. Using substandard parts can lead to poor performance or damage the machine.
Step 3: Troubleshooting Common Issues
Some issues may arise with your laser cutter, even with regular maintenance. Here are some of the more common problems and ways to fix them:
Fading or Weak Cuts
If your laser cutter is no longer cutting as well as it used to, the most likely culprit is a dirty lens or mirror. Cleaning these components is a standard maintenance check. If not, you may need to replace the laser tube.
Inconsistent Engraving
Also, if the engraving is not uniform across the surface, look for any misalignment with the laser beam. Improperly calibrated mirrors or a worn laser tube can cause misalignment. The mirrors could have become misaligned, and you may need to fix or change the tube.
Software and Connectivity Issues
If your laser cutter is not responding to the commands from your software, check the connection between the cutter and the computer. Make sure you have a proper setup with a driver for your machine and your design software. Check that your Flux Australia are working and connected.
Conclusion
This is all about setting up and maintaining your laser cutter so it performs thoroughly and lasts a long time. With the help of this guide, you can keep your laser cutter Australia running and working efficiently, whether you are cutting for a small business or a hobby you are working on. Along with regular maintenance, the proper calibration and use of the right consumables will ensure that your machine remains in good shape. Suppose you’ve invested in a laser cutter. In that case, understanding these basic setup and maintenance steps will go a long way in protecting that investment and ensuring your results are high quality.